Guidelines
General Guidelines
Preferred format for printing is Illustrator, Photoshop or HIGH RESOLUTION JPEG.
Before sending your files, make sure all fonts are converted to outlines (converted to outlines for Illustrator and PDF, converted to “shapes” for Photoshop)
Adobe Illustrator
Open File
In Your Main Menu Choose Select > All
In Your Main Menu Choose Type > Create Outlines
Adobe Photoshop
Open File
Right click text layers
In the layer menu that pops up > Convert to SHAPES
Corel Draw
Open File
In Your Main Menu Choose Edit > Select All > Text
In Your Main Menu Choose Arrange > Convert to Curves
Linked Graphics
Be sure to include or embed all of your placed / imported images when you send your artwork.
Proofing And Artwork
IS PROOFING THE SAME AS PROOF READING?
It’s worth remembering that when we proof your business card, we just check that it is technically capable of being printed. We don’t proof read it, we don’t check it for factual errors, we don’t check or critique the way that you’ve laid it out, and we don’t call you if we dislike like the colours you’ve chosen. We’re just the printers.
IS CREATING OR EDITING YOUR ORIGINAL ARTWORK INCLUDED IN THE PRICE?
No, the prices you see on the web site are from your print ready PDFs.
ARTWORK
This is the electronic file (usually a PDF) that you send us to print.
All images must be in CMYK colour
Make sure your artwork’s resolution is at least 300 dpi. This resolution will ensure that your design will appear crisp and sharp instead of blurry.
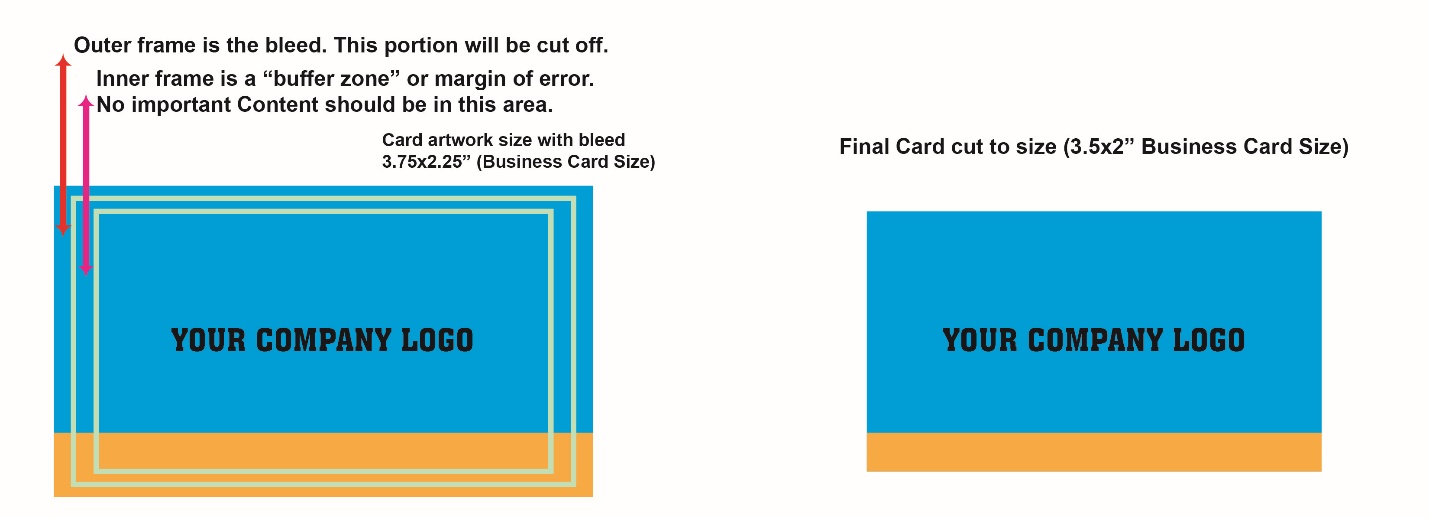
Make sure to include “bleed” with your artwork. Image “bleed” is where you want the image to fill a background completely to the edges of the card. The image must extend beyond the trim area so that colour will go edge to edge if there is a slight variance in the trim cuts. Image bleed is defined in each template.
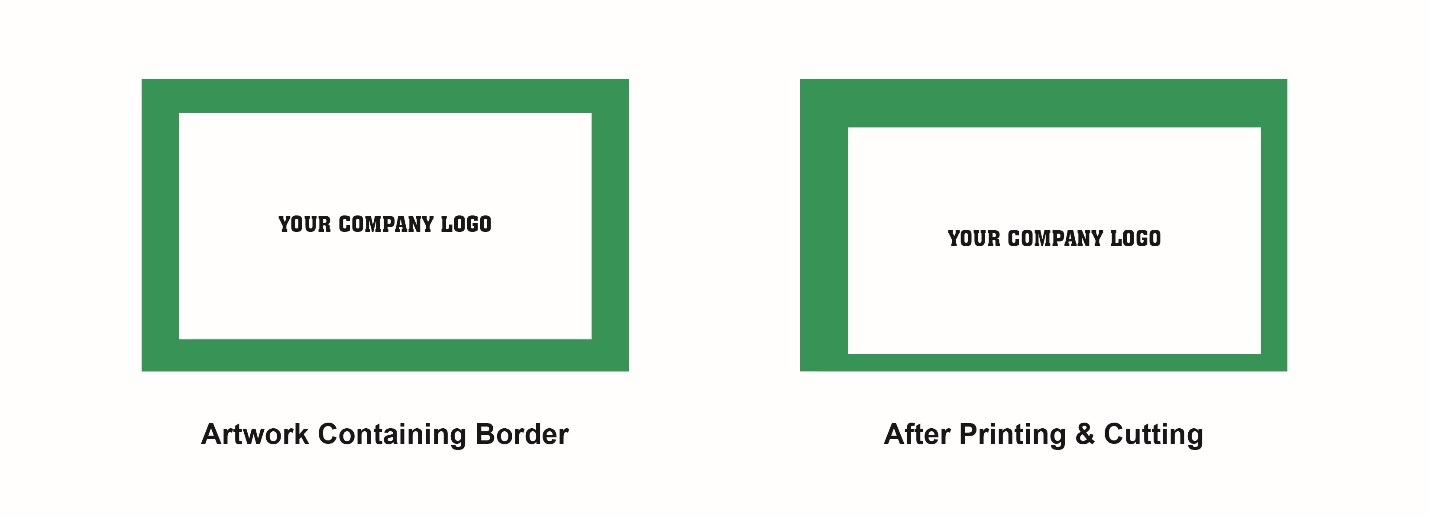
Due to cutting variances, card designs with a “framed border” are not recommended. A possible slight shift in cutting will cause the printed frame border to appear off center or uneven.
Please Note:
COLOR REPRODUCTION
All reasonable efforts shall be made to obtain the best possible color reproduction on customer’s work, but variation is inherent in the print process and it is understood and accepted as reasonable. We cannot guarantee an exact match in color between the customer’s photograph, transparency, proof, electronic graphic file, or previously printed matter.
Bleed is a printing term that refers to printing that goes beyond the edge of the sheet after trimming. The bleed is the part on the side of your document that gives the printer that small amount of space to move around paper and design inconsistencies. Bleed information refers to elements outside the finished piece. Often a printer requires bleed information on pieces that have bleed to allow for “printer bounce” when cutting a job down to size. Failing to provide bleed information and crop marks can result in finished pieces showing a thin area of white on the edge.
“BLEED”
The image below shows the necessary extra margin needed during the printing and cutting steps of production. The same principle applies for all other printed formats

SAFETY ZONES:
In order to prevent your image (text or picture) from being trimmed or cut off, the image must be 1/8 of an inch (0.125 in.) from the trim edge of your layout.
Any images that are meant to extend into the edge of your design must extend into the bleed area.
BORDERS:
Due to slight shifting that may occur during cutting, it is not recommended that you add a border, as we do not guarantee that your border will remain the same size after cutting. See example below.

